Author: Mark Matthews, Principal Consultant
Published November 14, 2022
Overview
In Part 1 of the series we covered prerequisites in preparation for migration at scale on a Windows Server environment, including planning, configuring AWS Migration Factory and AWS MGN; and then stepped through the installation of the MGN agent.
With the replication of the Windows servers complete, in Part 2 of the series, we move to testing the migration, running the full cutover of the servers and lastly adding IaC and modernization to the environment.
Migration Test
With replication completed, a TEST MODE migration can be performed to check that the server will be built in AWS without any issues. All TEST MODE migrations should be assigned a “TestMode” Security group with no Outbound traffic so as to not break anything (this Security Group should be created prior to migrations)…the test instance should only have access to RDP’ed into. From Migration Factory deploy server in TEST MODE.
- An optional ‘Validate’ can be performed before initiating Launch
- On the Migration Factory console, select Wave on the navigation menu.
- Select target wave, and choose Actions. Select Rehost, and then select MGN.
- Select Launch Test Instances Action, select All applications.
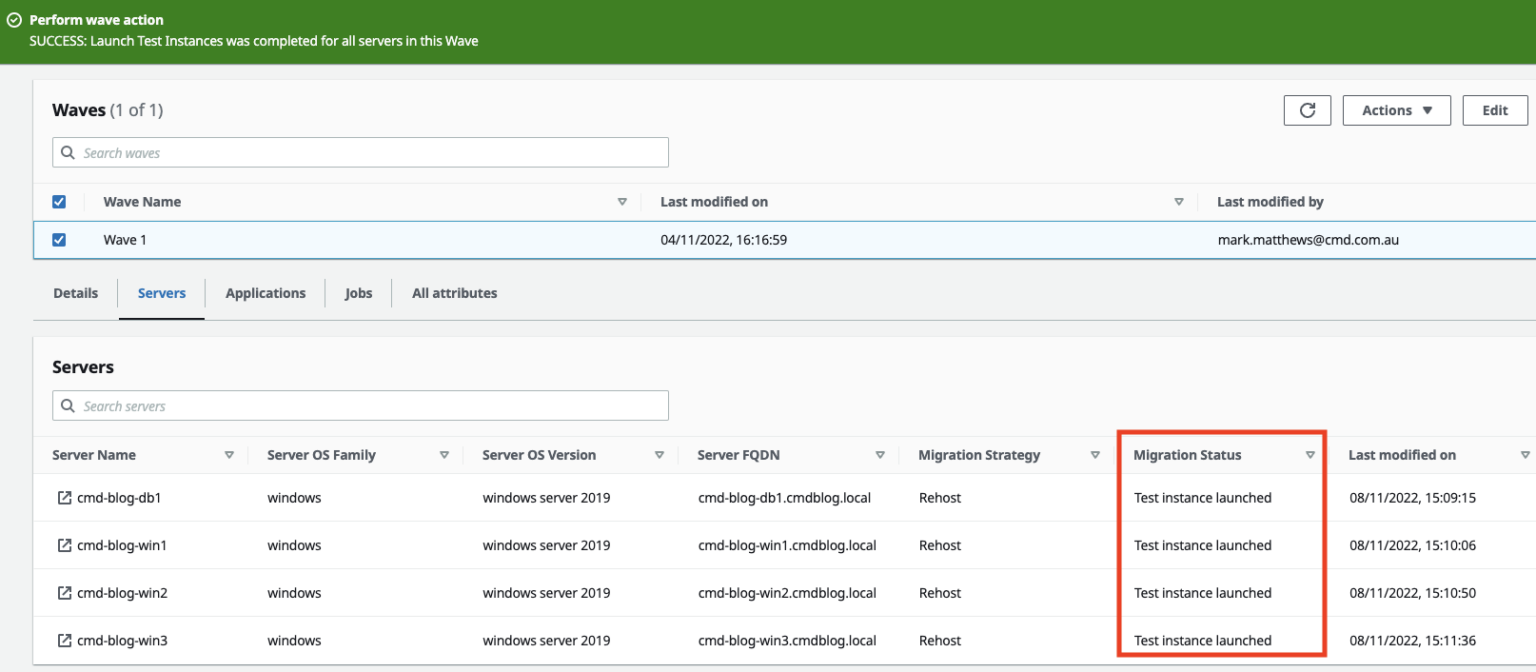
- Choose Submit to launch test instances.

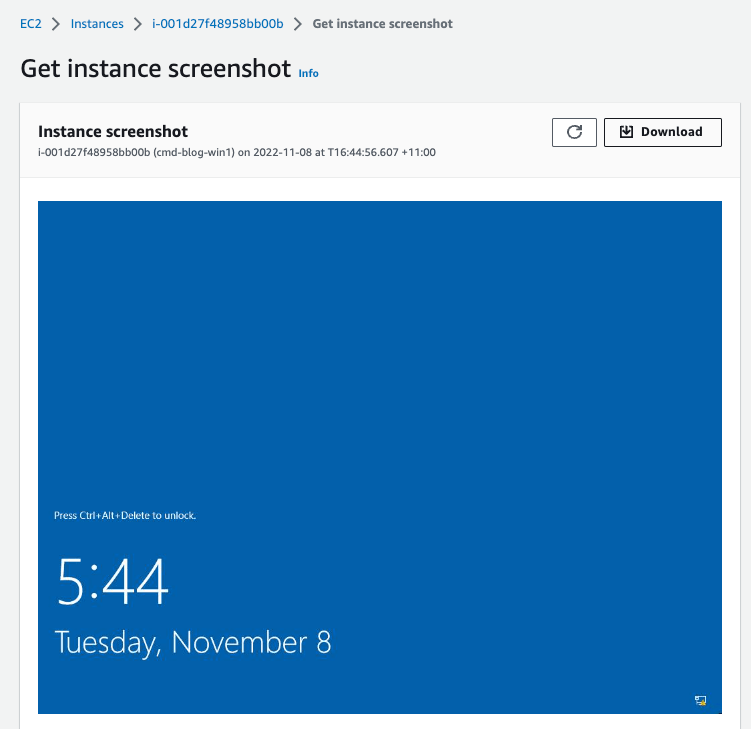
Depending on the OS version and if the server was in a state of ‘Windows Updates” the migration process may vary in migration times. The servers will go through several reboots during the migration process (installing drivers and AWS software). Two “Healthy Status Checks” usually indicate a successful migration, but this is not always the case and you may need to continue waiting for additional drivers to be installed before accessing the server. Using the ECS Screenshot function can give you a good indication when the server is ready for testing.
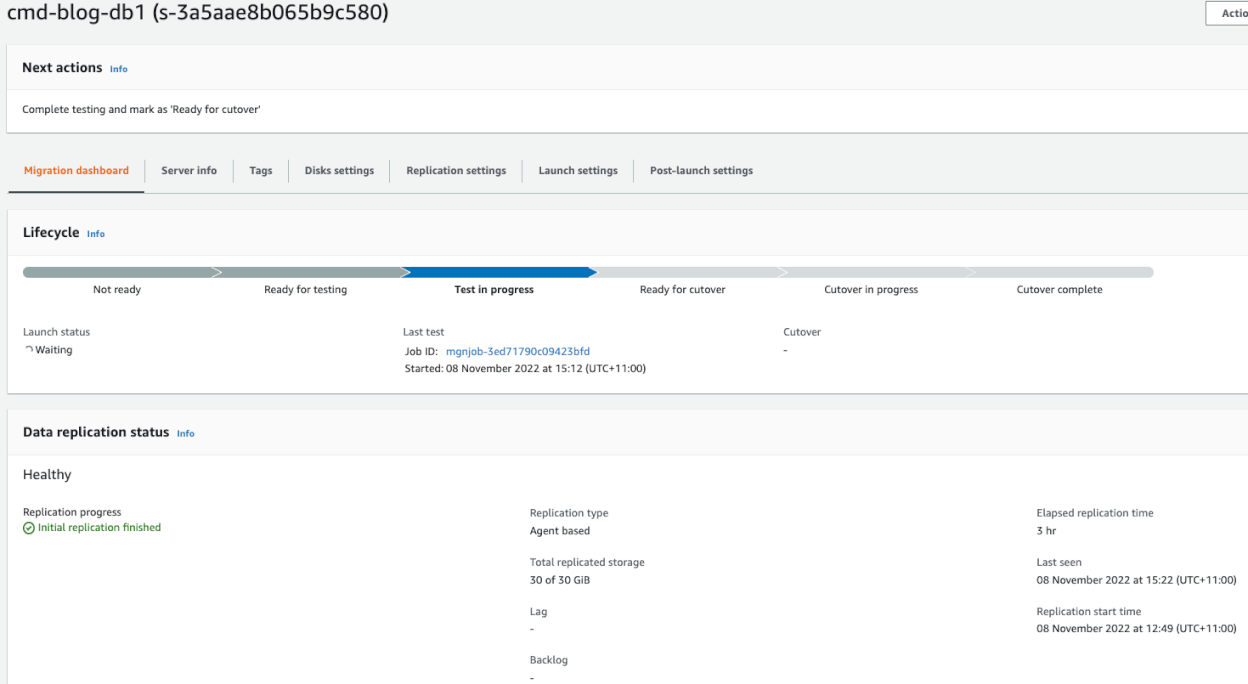
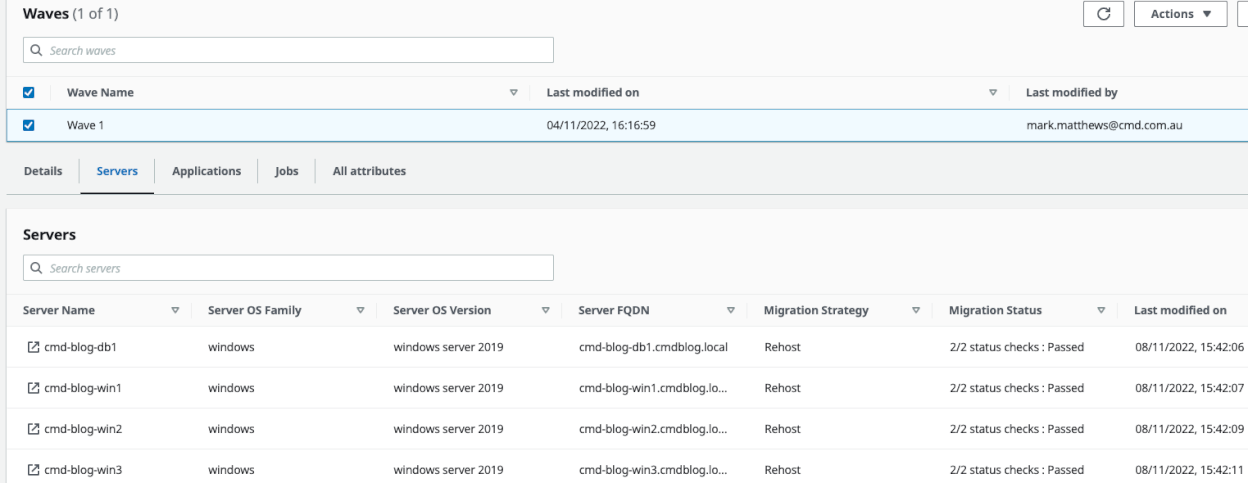
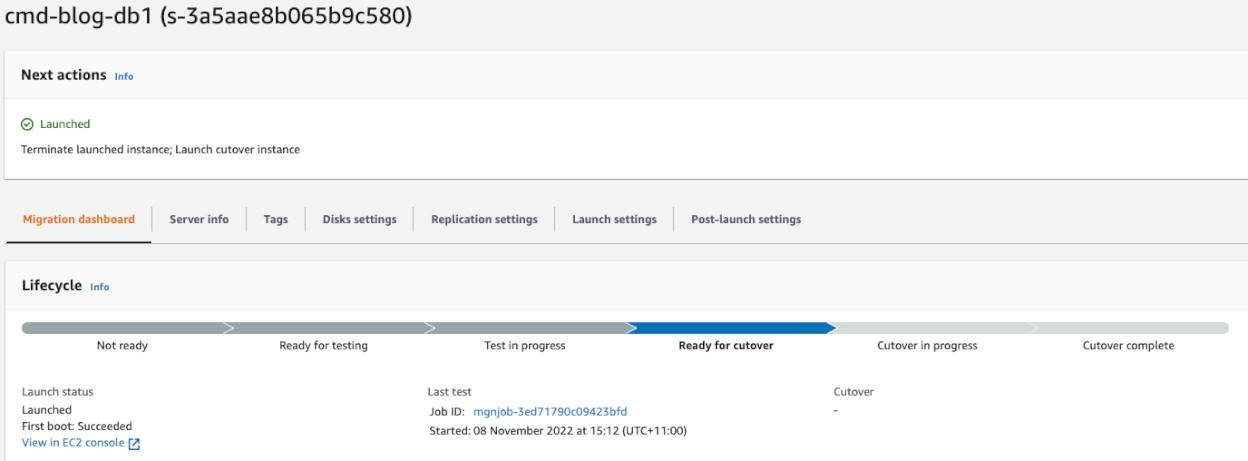
The Server status in MGN will change to “Test in Progress” and will also update in Migration Factory
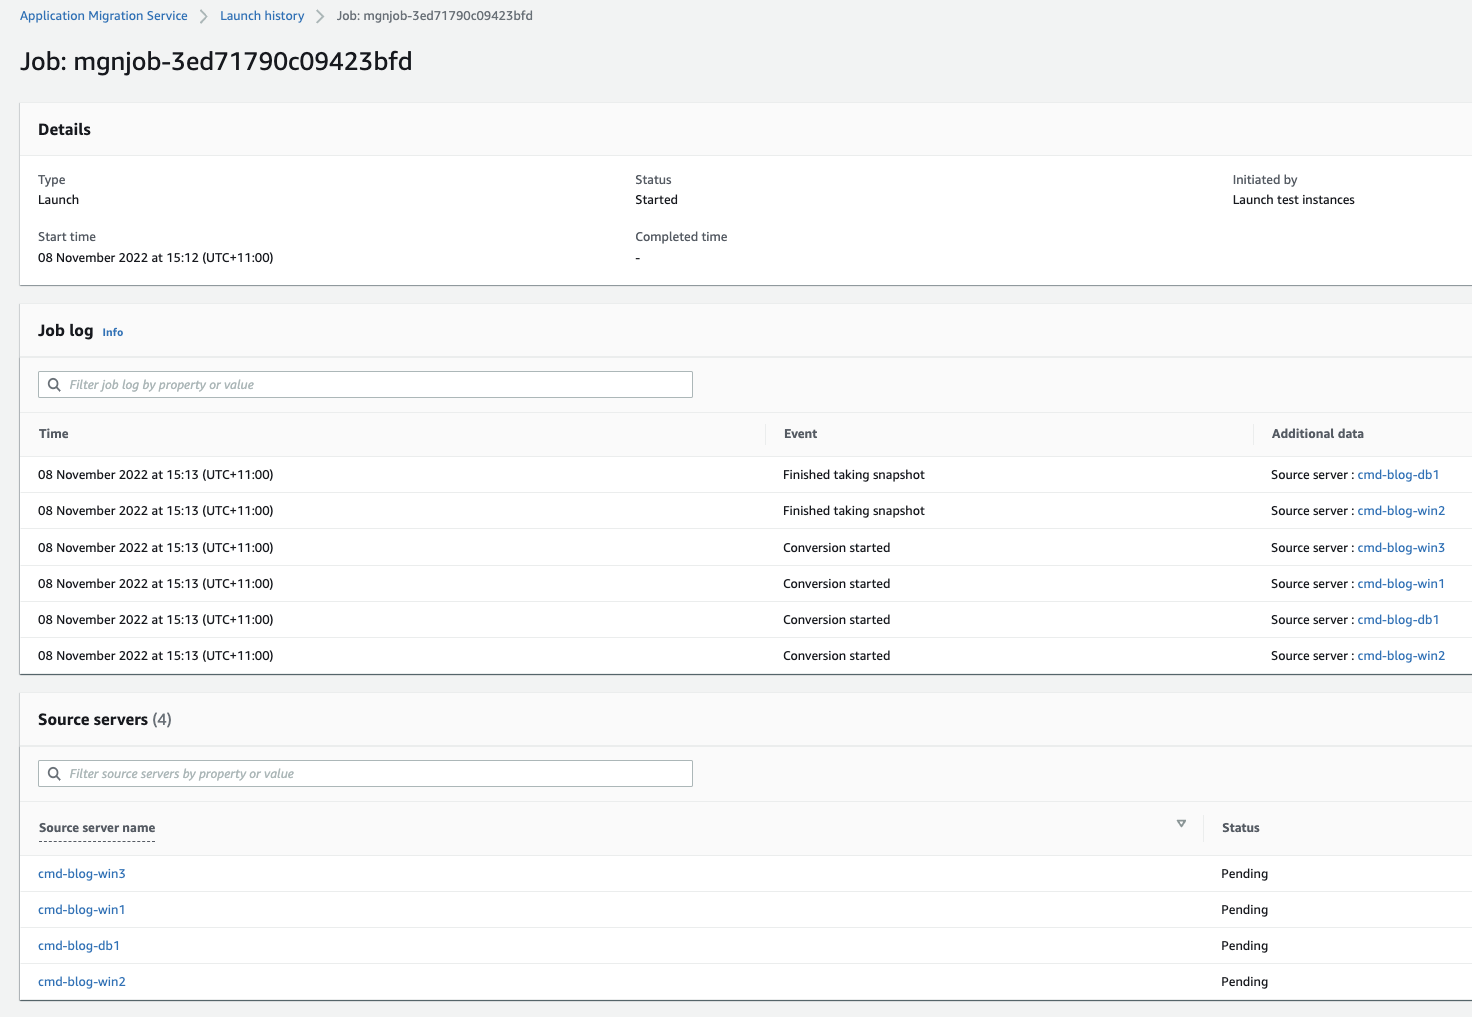
You can also go to the AWS MGN Console to view the real-time logs at the instance are being built.

Check that servers have been created successfully in AWS, by doing one or all of the following:
- Verify Instance Status from Migration Factory
- Navigate to the Migration Factory console, and select Jobs on the left-hand side menu.
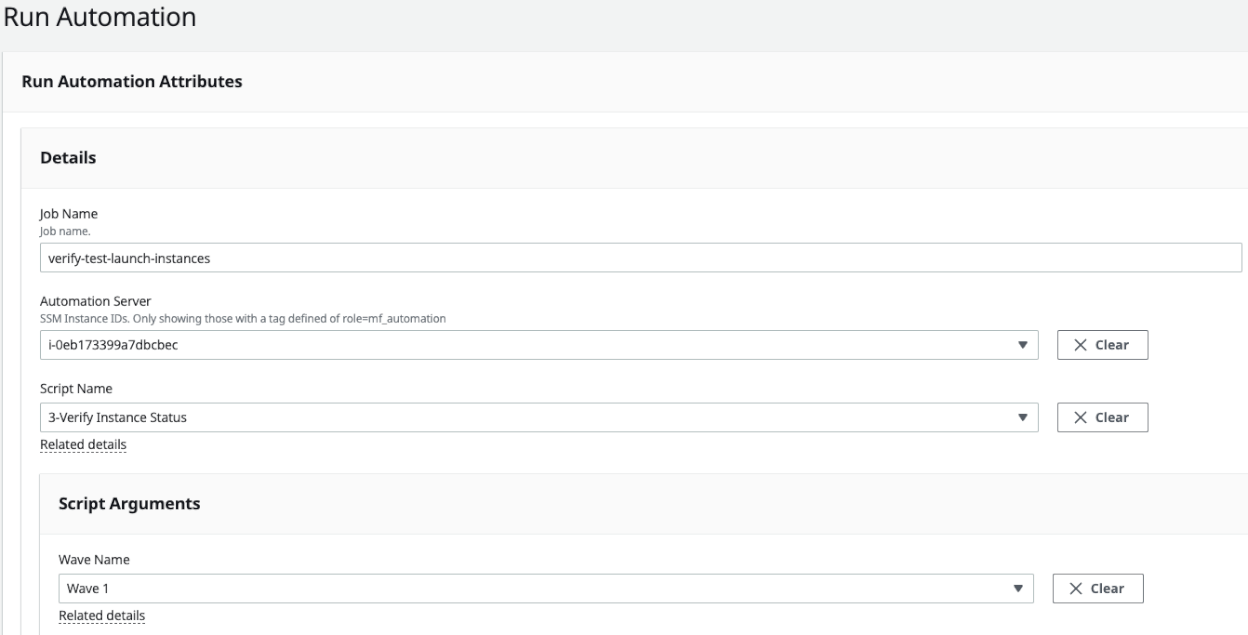
- Select Actions, then Run Automation on the right-hand side.
- Enter Job Name, select 3-Verify Instance Status script and your automation server to run the script.
- Choose the wave you want to run automaton, and choose Submit Automation Job
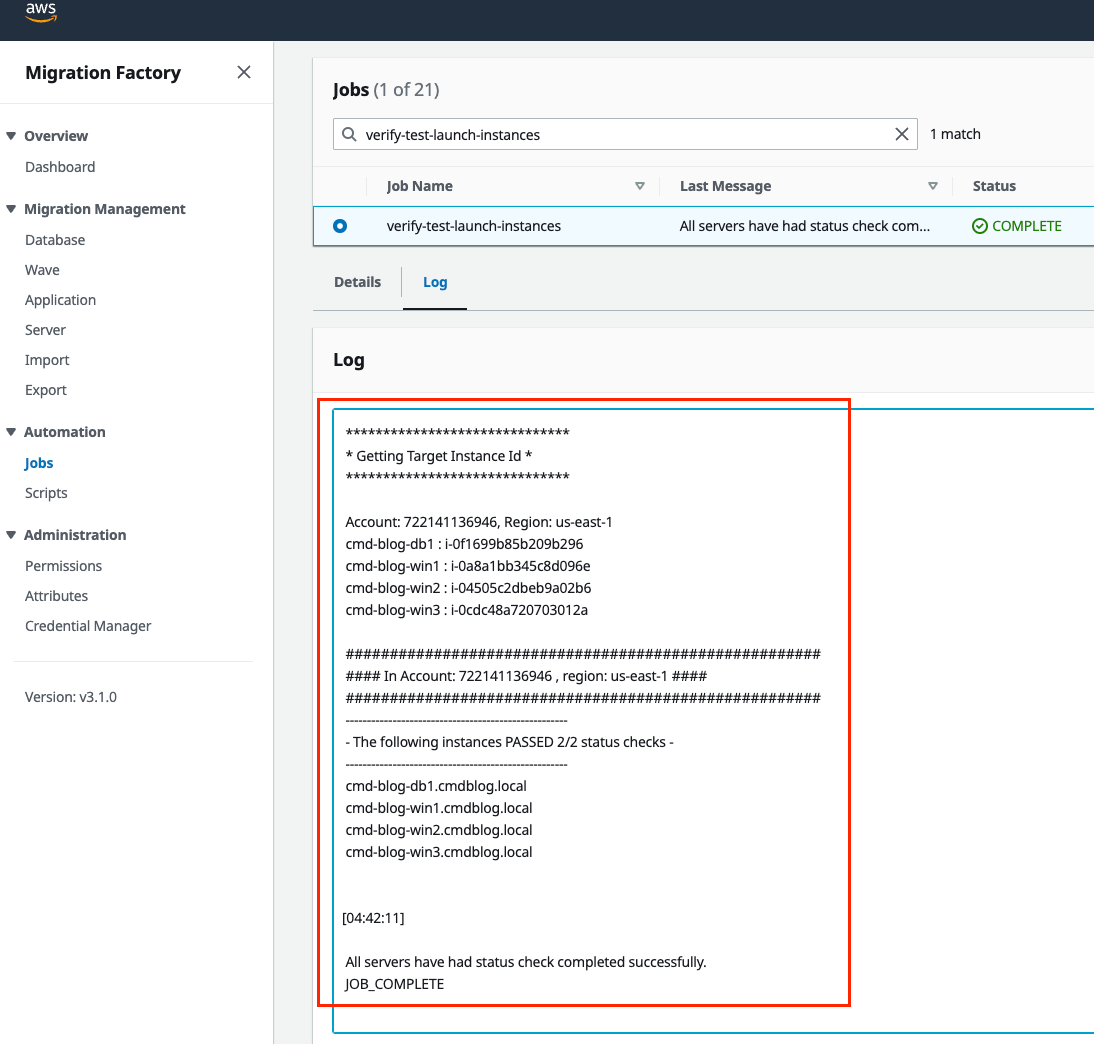
- Check the Migration Factory console (2/2 status checks : Passed)
- RDP into the server

* If after an extended period of time (+/-40min) this has still not migrated and you are unable to ping or RDP to the server, you can usually assume that there is a problem with the server and MGN migration will not work.
- You will then need to delete the Target instance of the server, do this through MGN or Migration Factory (see below comment) and troubleshoot the issue.
- This is normally resolved by updating the server to the latest Windows Updates, installing AWS network Drivers (see above optional section) or installing a Windows Service Pack
- When this is all done initiate another TEST MODE migration
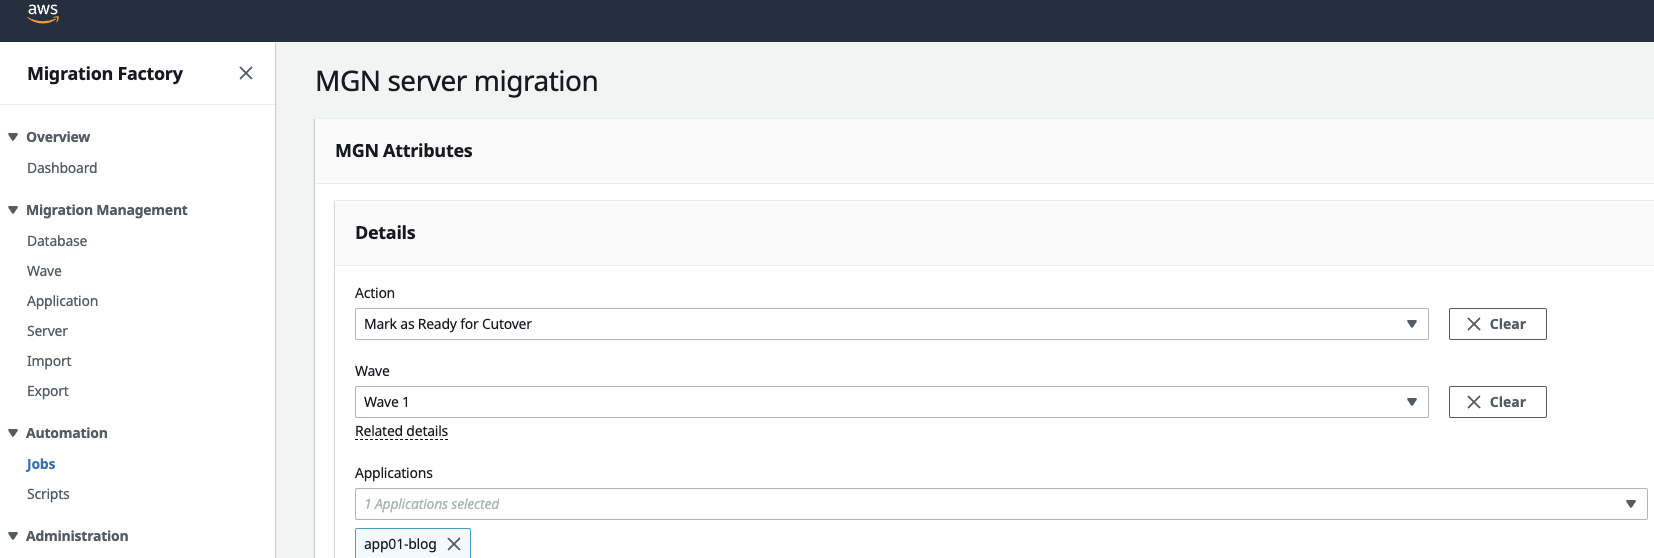
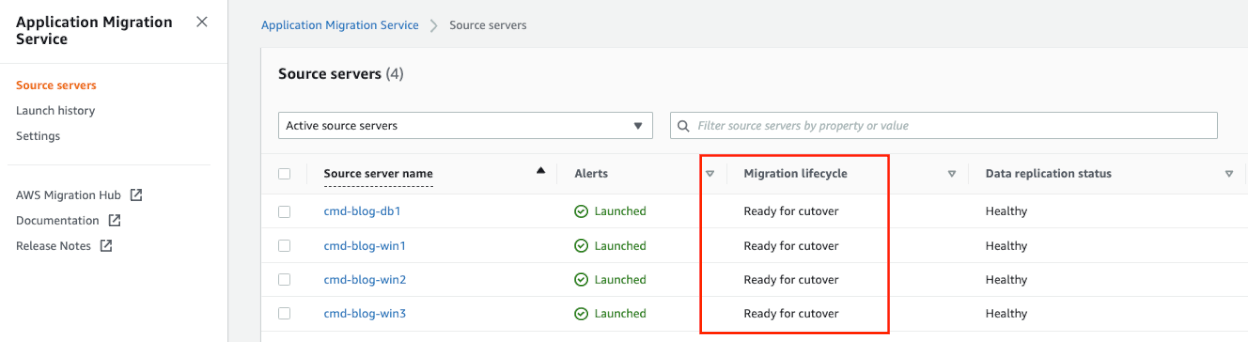
Once testing on the server is complete, go to the Migration Factory portal and select the following on the Test and Cutover section, “Mark as Ready for CutOver”, this will Terminate the instance/s and any resources associated with the ‘Test’ instances that were built. Status in Migration Factory and MGN to will be updated to “Ready for Cutover”
Cutover Server to AWS
The server is now ready to be officially migrated to AWS.
Before proceeding with the Cutover, there are a few tasks that are recommended
- Check that replication is still 100% after test servers have been deleted
- Send comms to stakeholders before migration.
- Stop any services before migration (SQL, Windows, Application, etc)
- As the CUTOVER process is initiated any changes made to the on-prem server during the migration will not be migrated across to the AWS instance. That is why I recommend stopping any services before a migration, allow the latest snapshot to take place (10min) and then start the CUTOVER.
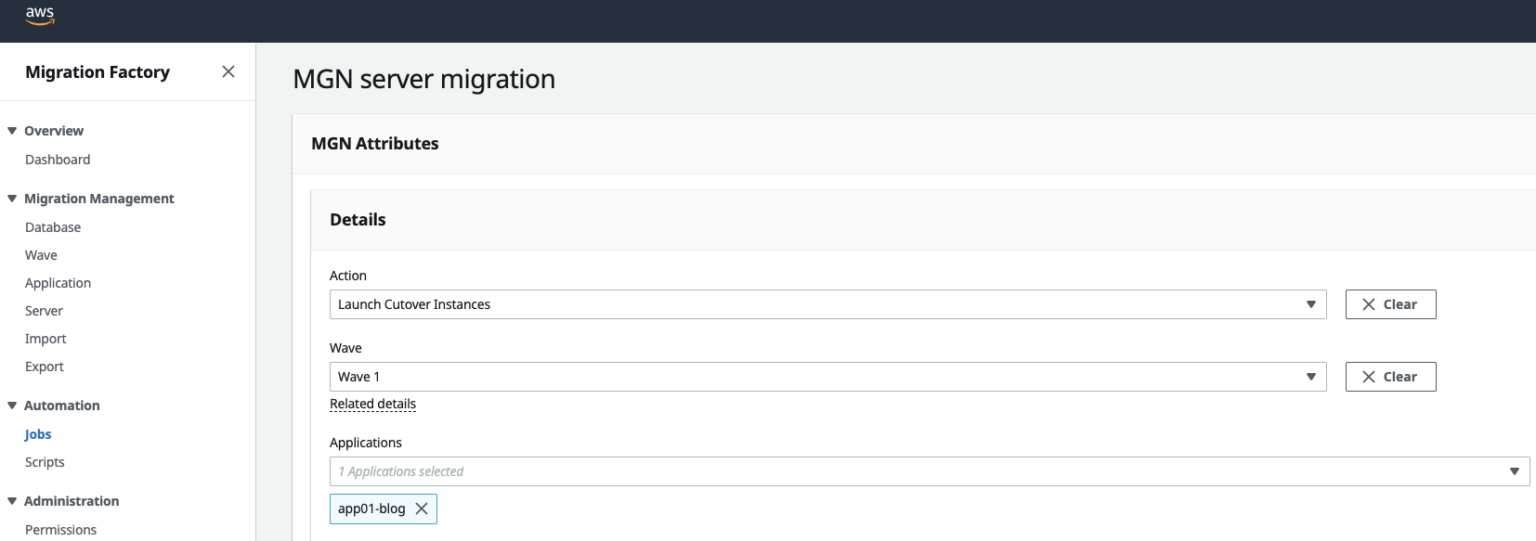
In Migration Factory initiate the CUTOVER by selecting “Launch Cutover Instances”.
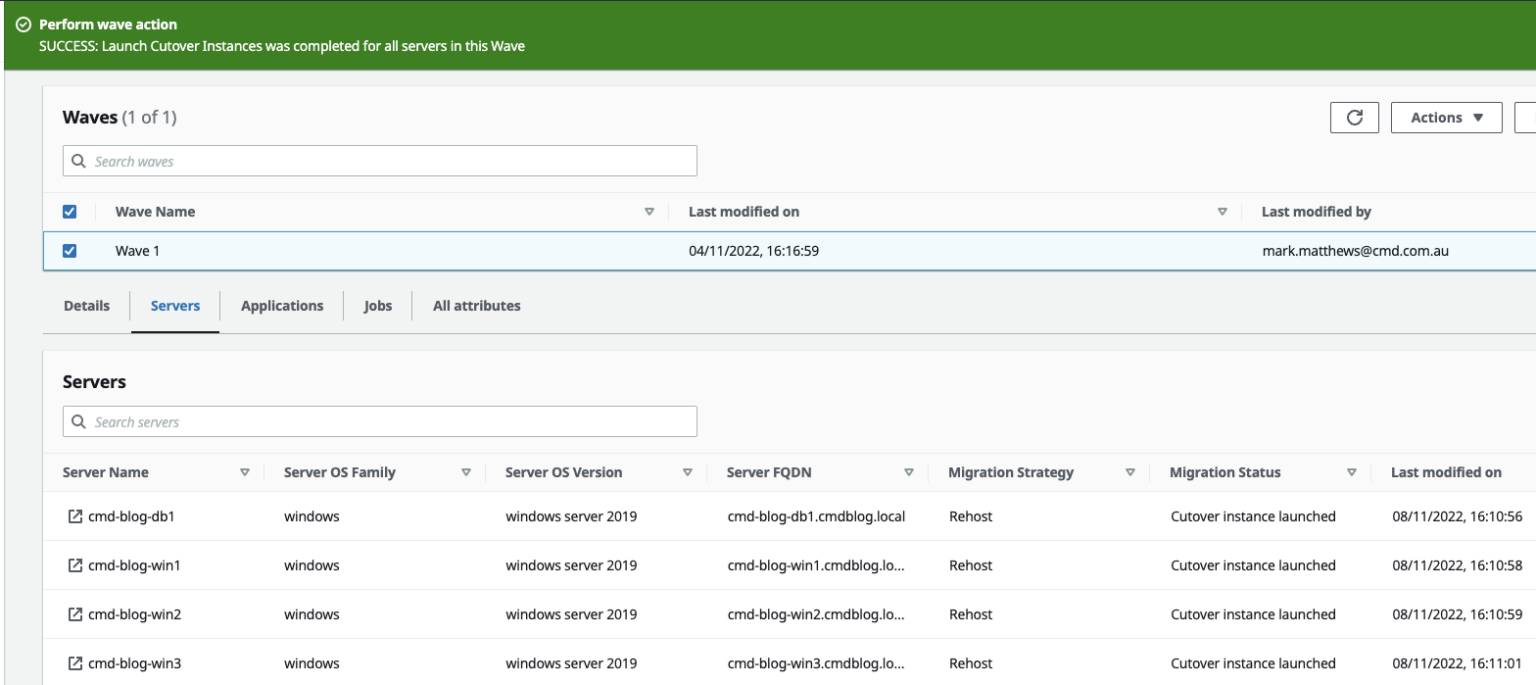

When CUTOVER is successful, run through the same checks as we did for the TEST migration. Also, if the servers are domain joined, check the DNS server and make sure that the IP addresses have changed to the new servers IP.
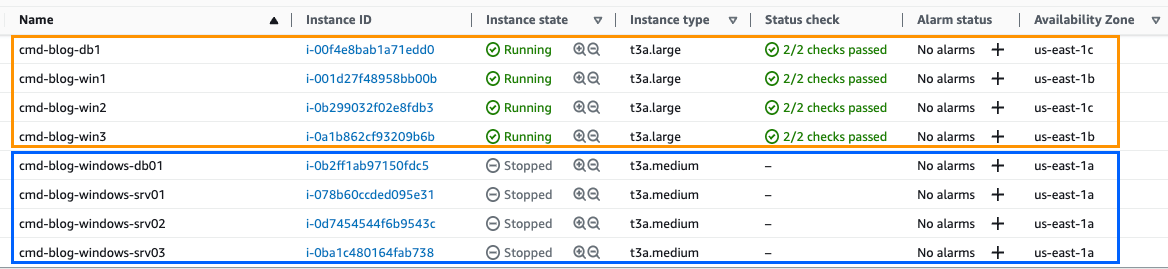
Power Off the on-premise servers. This step can also be done before the Cutover stage using the Migration Factory (4-Shutdown-all-servers) or running a command from the Execution server (this would need to be done before the Cutover phase or else Migration Factory will shutdown the migrated servers).

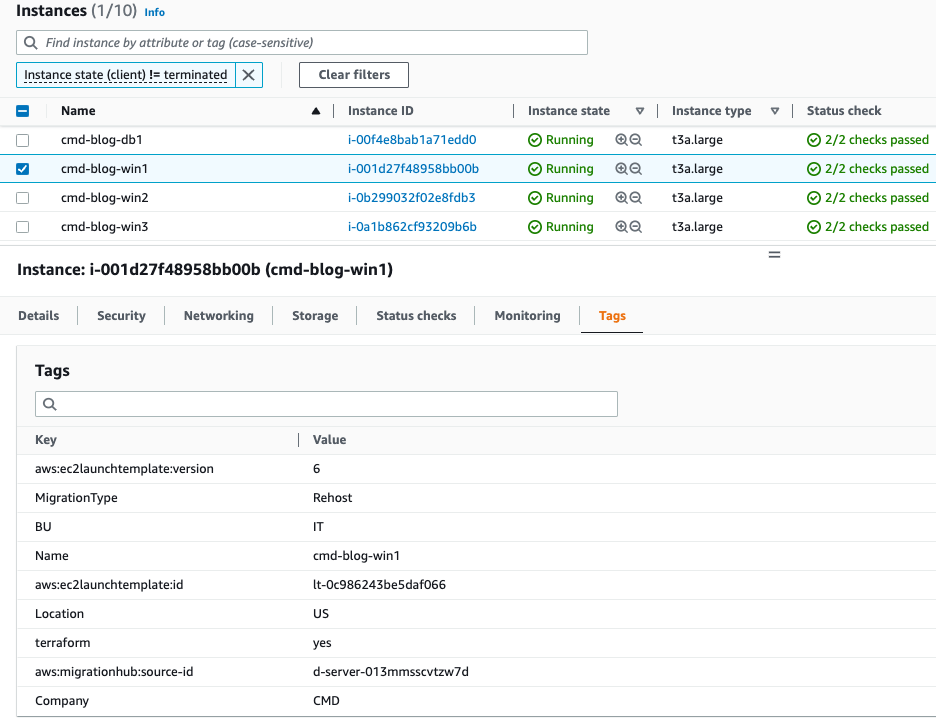
Orange – These are the migrated servers (AZ-B and AZ-C)
Blue – These are the “on-prem” servers that are now powered-off (AZ-A)
Screenshot of migrated “cmd-blog-win1” server
Cleanup
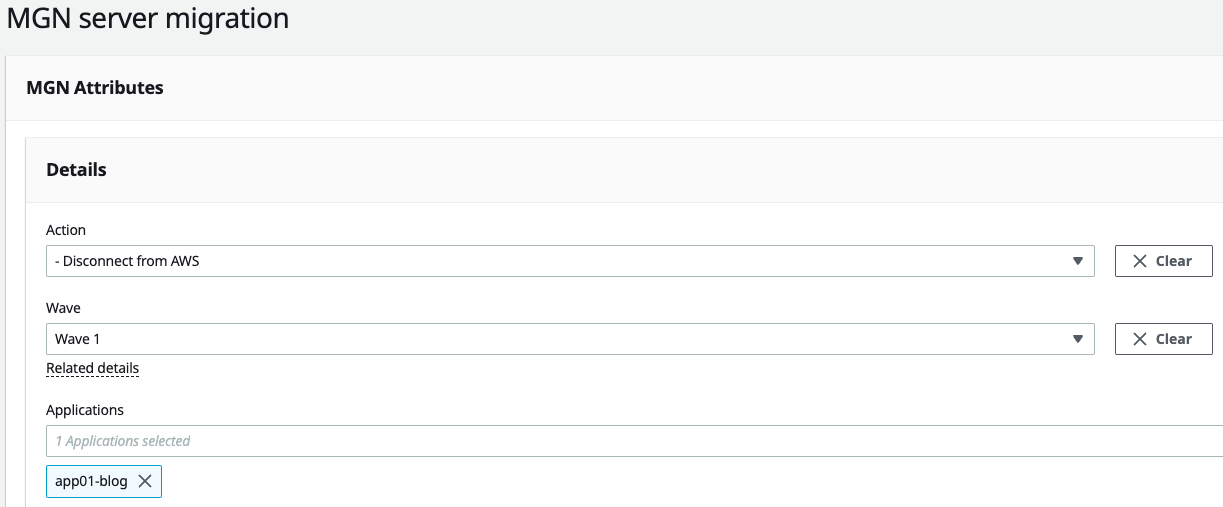
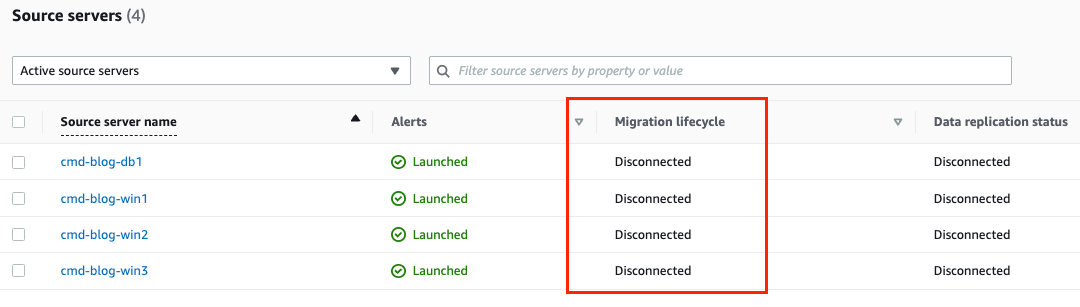
Clean-up steps now are to run the “Disconnect” and “Mark as Archived”. This can all be done from Migration Factory or through the MGN Console. This will remove any resources associated with the on-premise servers.
Infrastructure as Code (Terraform)
Overview
After the servers have been successfully migrated and tested in AWS, they can then be put into an IaC state to easily manage and maintain them as well as building any additional AWS services. This can be done using Terraform Import or for the example below a CMD Solutions custom built module called, “Terraform Migration Assistant” will be used. This was built to quickly, and at scale, incorporate IaC to migrated servers. Please reach out to CMD Solutions for information about this.
Prerequisites
Using Python, 3Musketeers and ‘Terraform Import’ it scans EC2s in an AWS account that has been migrated using a specific tag, and then builds the Terraform state file and code to fully manage the EC2’s as IaC.
For a more detailed overview of the 3 Musketeers pattern please refer to a recent blog by Patrick at CMD, link here.
I’ll be using a separate repository (migration-blog) to manage all the EC2s and resources associated with this migration.
Most of this work can be done prior to the migration (Repository, 3 Musketeers pattern, ALB, Security Groups, etc) which would make the migration process much quicker.
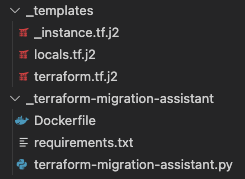
Repository breakdown:

The Terraform Migration Assistant is made up of Docker, Python and Jinja2 files.
Some ‘best-practice’ prerequisites include ensuring you have a Terraform S3 backend with DynamoDB already deployed in the shared account.
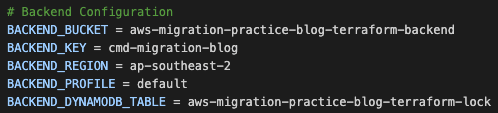
Configure the Terraform backend on the `Makefile`, defining the variable values below:
- Bucket (only required if using a shared location, which is best practice)
- Key
- Region
- Profile (only required if you have multiple AWS accounts. Can just use ‘default’ if one account)
- DynamoDB Table (only required if using a shared lock id location, which is best practice)
IaC Process
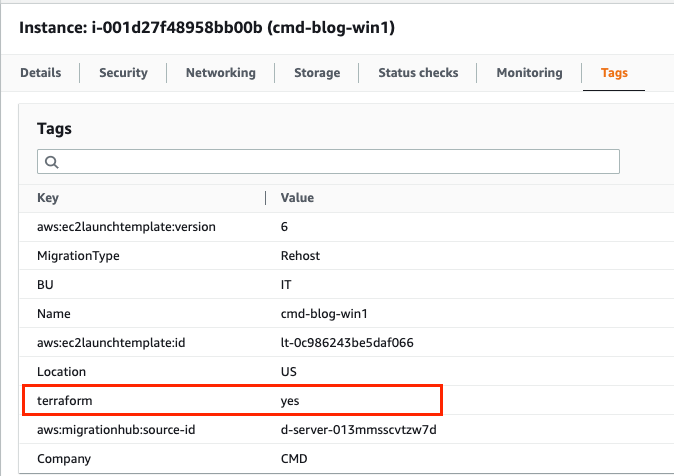
Confirm all migrated servers have a common tag that the ‘Terraform Migration Assistant’ module will use to pinpoint which instances are actioned. The tagging of migrated servers can be done in Migration Factory during the migration process.
Navigating to the repository in your terminal you can now run the script to begin the import process.
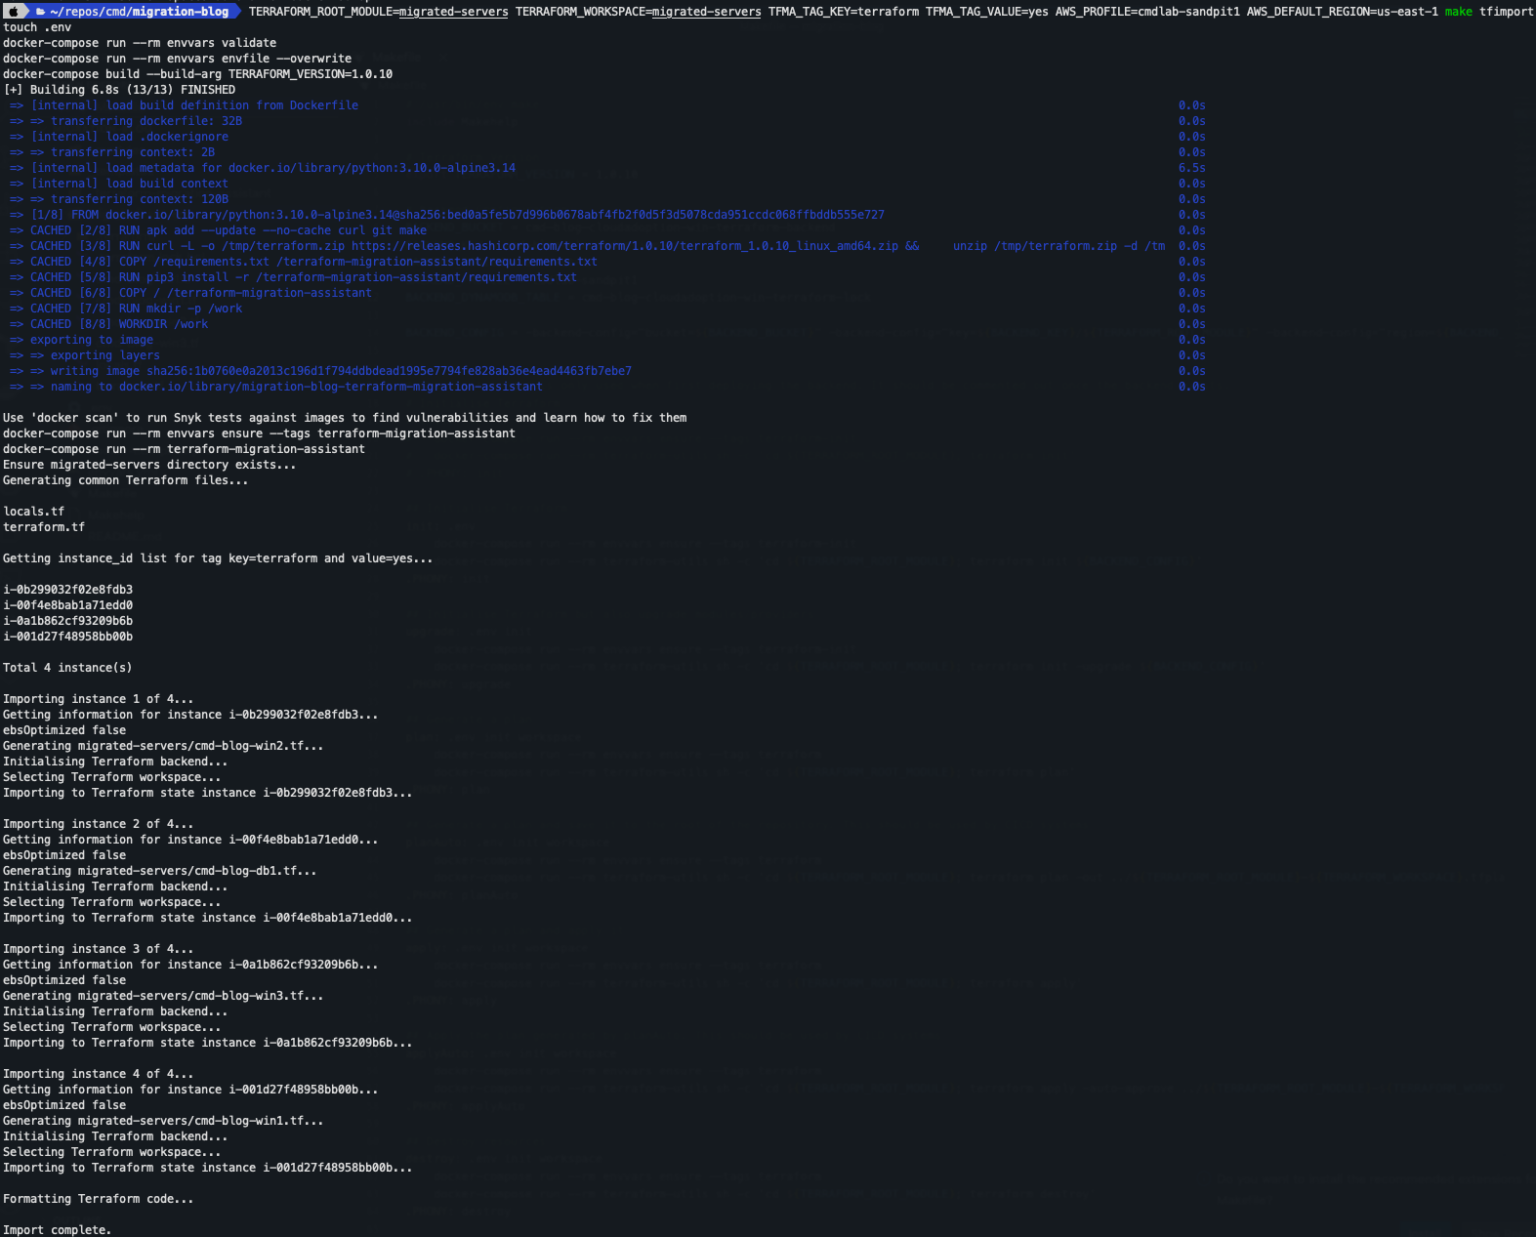
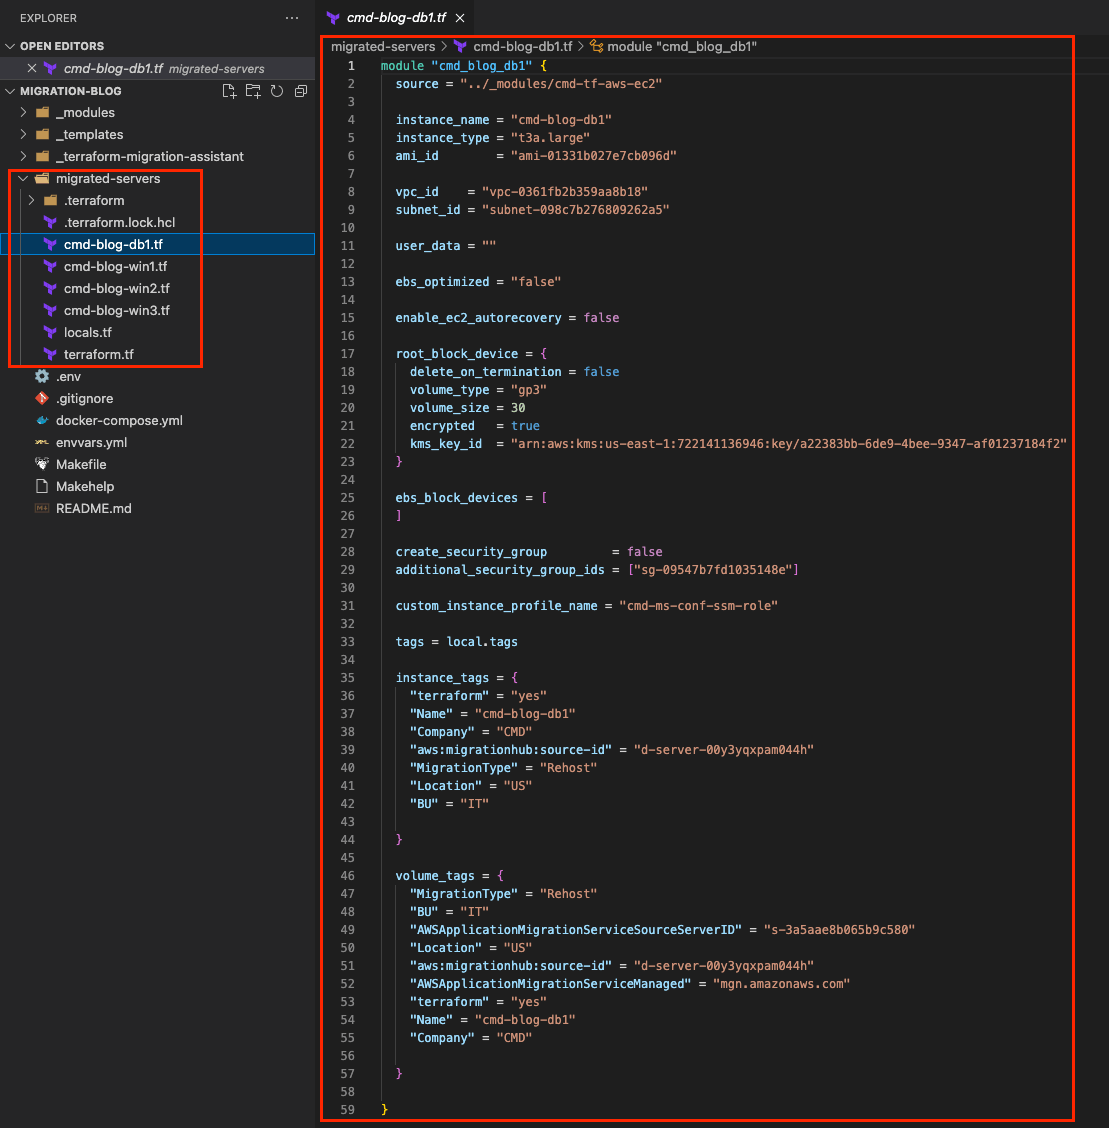
Going to the repository, you will now see all the servers have been imported as Terraform and the Terraform state and lock file have been created.
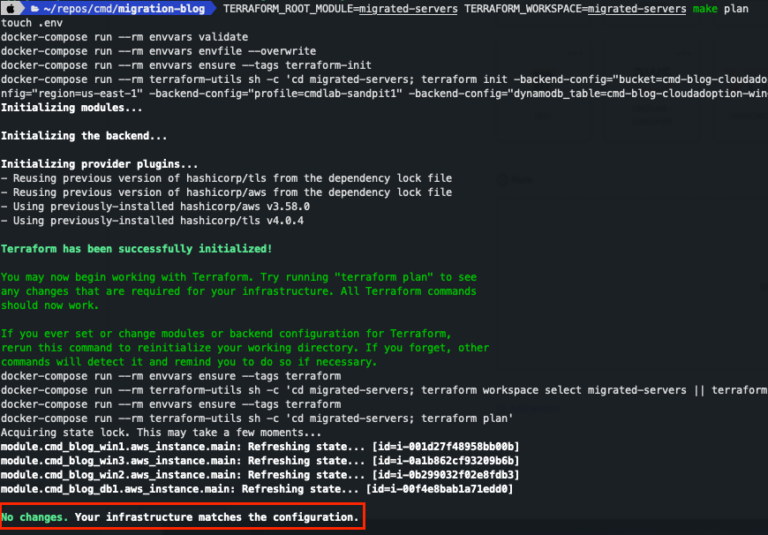
Test Code
Next step is to run a ‘make plan’.
There should be nothing that needs to be changed.
Before running the last step (make apply), let’s add new resources and update the migrated servers…all with Terraform.
- Create new Security Groups for the servers, only allowing required ports for the specific servers
- Attached the Security Groups to the instances
- Remove any Security Groups that were previously assigned to the servers
- Build an ALB and attached it to the frontend servers
- Tag all servers with appropriate tags
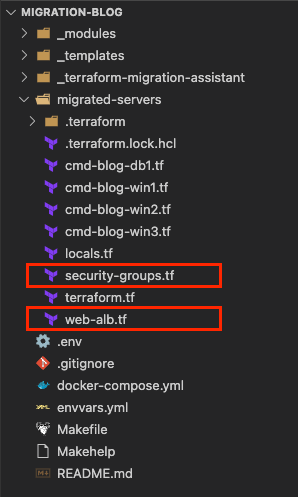
This is what the final repository with the migrated servers and new resources will look like (Security Groups and ALB).
* the “_templates” and “_terraform-migration-assistant” can be deleted now.
We can now run the ‘make plan’ to test the Terraform code is all correct and that nothing is marked as destroy.
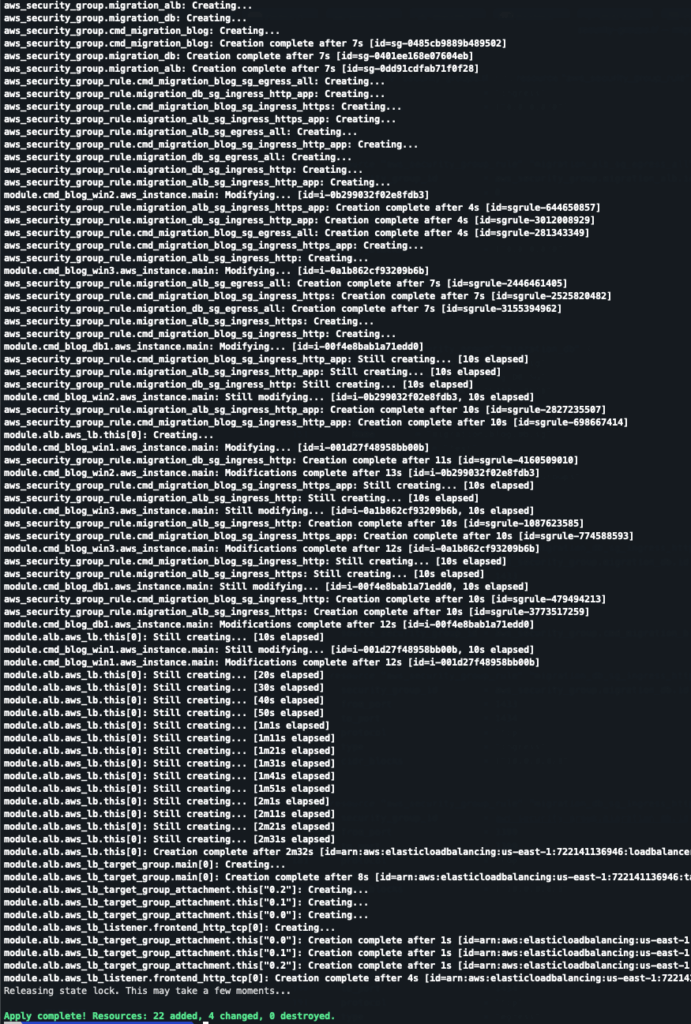
Deploy Code
Running ‘make apply’ can now be done to complete the building and configuration of all resources and finalizing the migration of the on-premise environment.
Migrated Solution
- Instances with role specific Security Groups attached to them
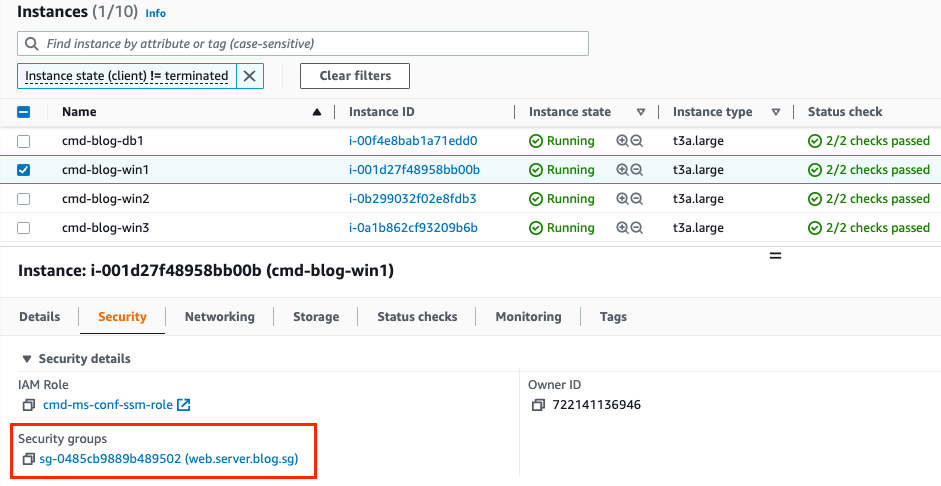
- Instances with role application specific tagging
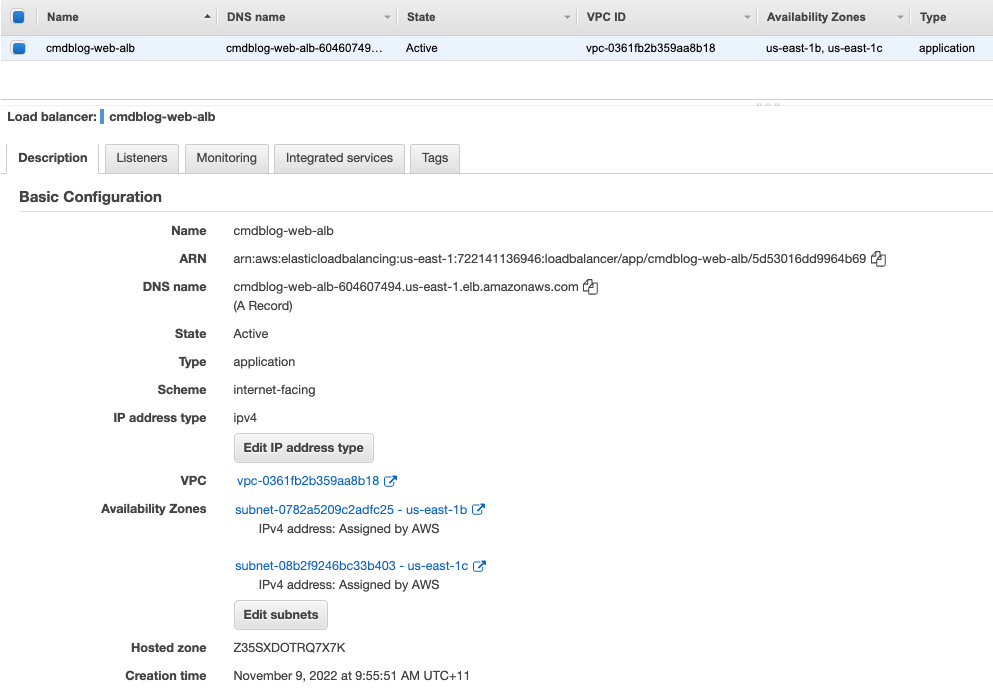
- ALB
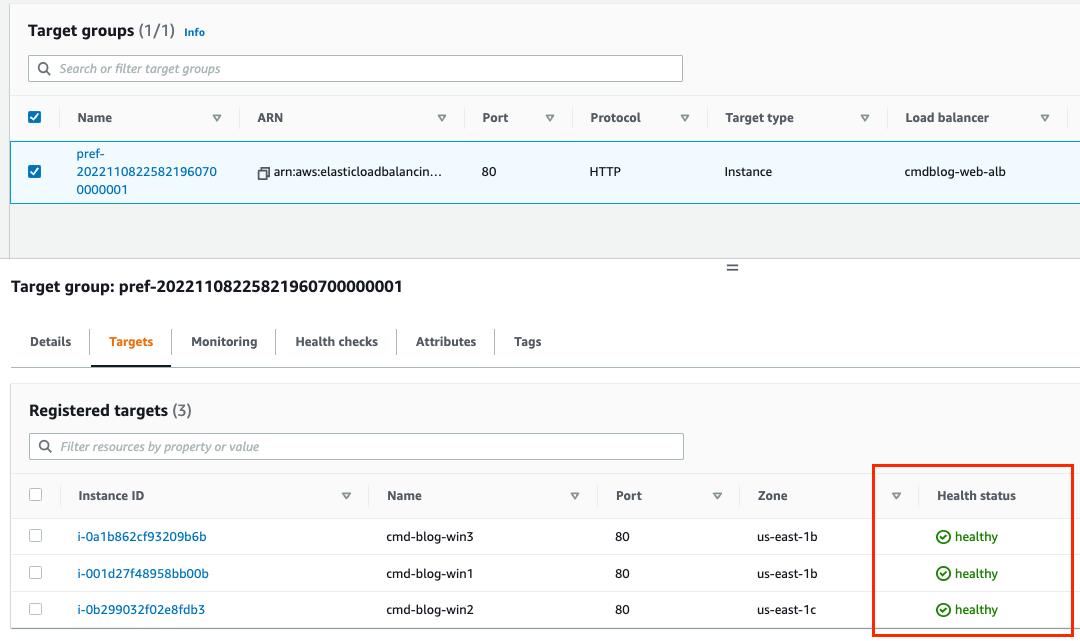
- ALB Target Group with all three web servers showing as healthy
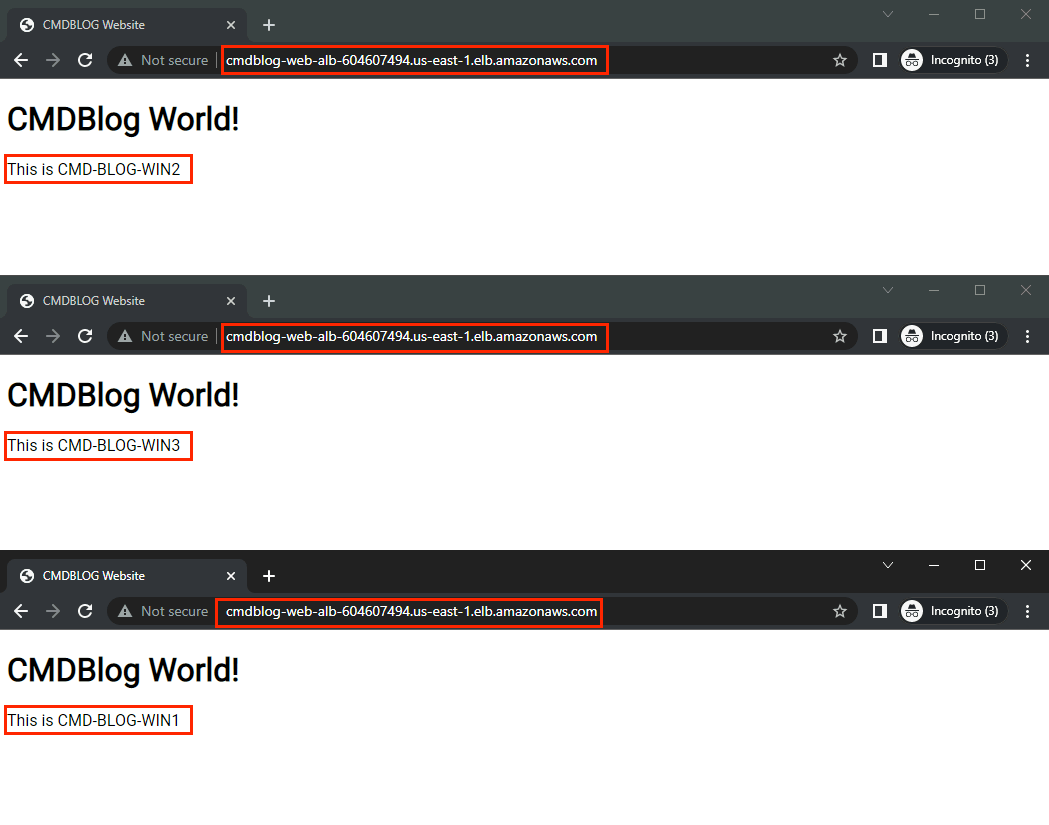
- Website is accessible through the ALB. If you refresh the URL you will see traffic being redirected to the different web servers randomly
Final Thoughts
Migrating and modernising an application use to be an extremely painful and a time-consuming project, but with the right planning, process and tools you can see that getting an application migrated to AWS applying modernization with improved security using AWS native technologies and leveraging IaC; make the process quick and painfree.
If you’re looking for assistance in cloud adoption and migration at scale Mantel Group can help! With expertise in cloud adoption, modernization, IaC, DevOps and implementation, we can help put you on the right path towards a successful and valuable cloud adoption project.
