
Introduction

The idea is simple: spin up a Squid Proxy, point your browser to it and use it to give you a fixed, knowable IP address that can be added to an access list to permit your connections into a secure environment. The problem comes when you decide that you want to do this in ‘The Cloud’, and the users of the proxy are currently on non-fixed IP addresses and your organisation uses a zero-trust model and there is no VPN, per se.

Squid comes from a time long before the cloud, when organisational networks were restricted to their own physical space and keeping them secure was just a matter of not letting anyone into the building. Typically with Squid Proxy you would protect the access to the proxy with an access list in the proxy to allow only certain IP addresses to connect (eg: the building IP addresses), or you could use NTLM authentication to require a user to firstly authenticate, but as I’ve already mentioned the first solution assumes that the user has a fixed IP and the latter requires you to have Active Directory authentication. If you are part of a modernised cloud based organisation then you are likely to have neither. Since having an open proxy on the public internet is just an invitation for nefarious activities, you need a way to protect it in this modern environment, Google Cloud ‘Identity Aware Proxy’ to the rescue.

Identity Aware Proxy (IAP) is a GCP service that allows you to protect web services behind an authentication gateway, and will only allow users access to that service once they have authenticated. This is built into all Google Cloud projects, and allows you to nominate specific users or entire domains to have access to the proxy. What is better is that it not only works for HTTP/HTTPS connections from your browser it will also allow you to SSH to remote systems from the same IP address. This then gives you the ability to nominate a single IP address for all your service connections into the secure environment. The security team will love this!

Deploying

So how do you set this up? I hear you ask. I am going to walk you through setting this up on Google Cloud using some Terraform that I have created. I’m going to assume that you have a basic understanding of the command line, GIT, and Google Cloud…. Let’s start.

Start by downloading the Terrafom repo, just do a;

command from the terminal. Once the repo is copied down you will find a file called config.sh open it in a text editor and plug in the values you see between the < > symbols.

The values you are interested in are, PROJECT_ID, REGION, ZONE and  IAP_USERS. The first three should be straight forward and will depend on what name you have given your project and what region/zone you would like the resources deployed, select a region/zone closest to you. The last value is a little more obscure and I have tried to explain in the comments how to format it. You have a few options here;

To specify a single use just put; 

export IAP_USERS=’[“user:bob@example.com”]’

To specify multiple users make it in a list format;

export IAP_USERS=’[“user:bob@example.com”,

“user:john@example.com”]’

To specify and entire domain use this format;

export IAP_USERS=’[“domain:example.com]’

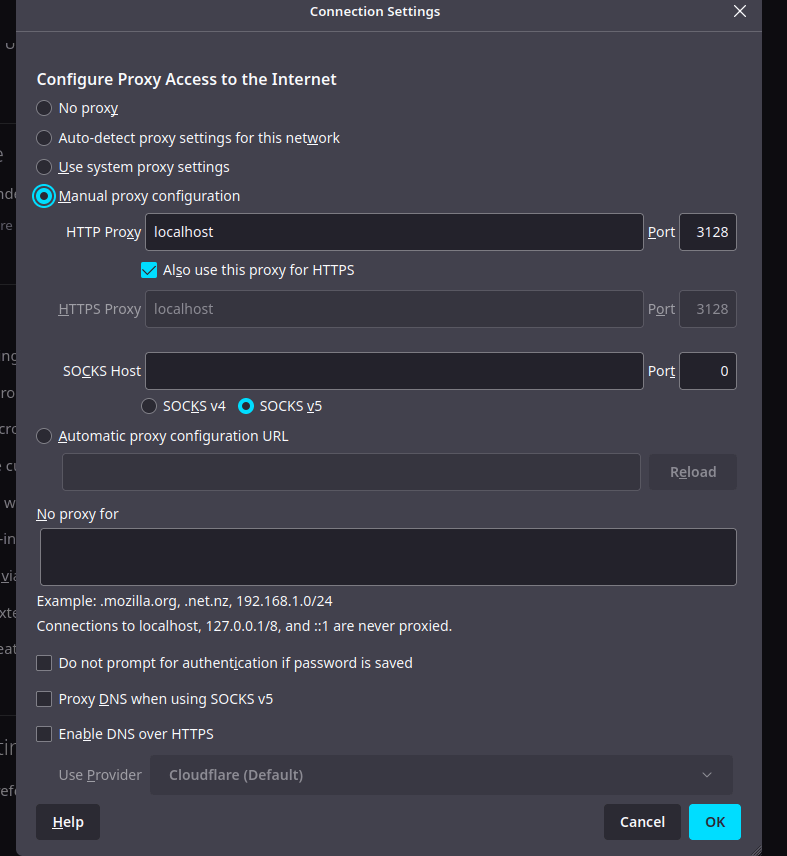
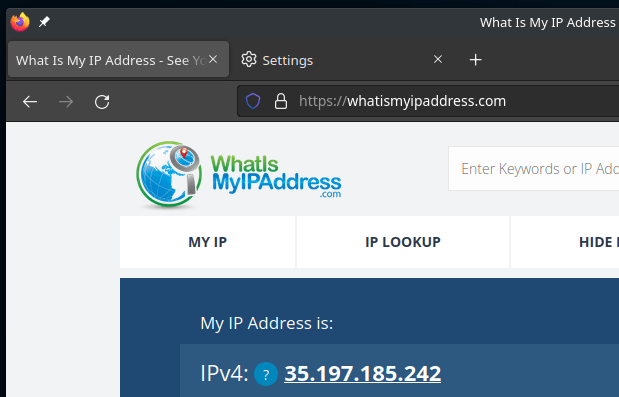
Go into your Google Console and create the project with the same name you have mentioned above. Now simply run deploy.sh from the command line. The script will spin up cloudbuild and deploy the terraform. Once complete the script will output an IP address, make a note of this. This address will be the source address of any connections that are established through the proxy.

NB: The deployment assumes that the ‘DEFAULT’ network exists, if it has not been created or has been removed then you can create it manually, or you can change the default value for the NETWORK variable in variables.tf.

Once the terraform is deployed Squid will be up and running after about 15 minutes.


Usage

I’m going to assume that if you are here reading this then you should know how to set the proxy value for your particular browser, if you do not then you can easily Google that.

To get the proxy working you firstly need to set up an IAP tunnel into your project which will connect the Squid Proxy to IAP and allow you to tunnel. Do this from your local machine using the gcloud command;

Change the values for <zone> and <project> to your appropriate values. Once the tunnel is connected you can set your local browser to proxy through localhost:3128, to do that in Firefox for example set your proxy as per;

It’s that easy, then your traffic will appear from the IP address that was given in the Terraform output above.

It is also possible to proxy SSH connection through the proxy host as well. This is slightly more complex and assumes that you have a host on the public internet that you can ssh into. Set up the IAP tunnel with the following command;

As per above, change the values for <zone> and <project> to your appropriate values. However this time you also need to set the values of <remote server account> and <remove server ip>, these values will determine exactly which remote host you will be connecting to.


Logging

All access with SQUID and SSH Tunnel are logged. All AUDIT logs have been enabled on the project. You can easily set up some filters to allow you to see those logs.

Then you should be able to see who has logged in using IAP;

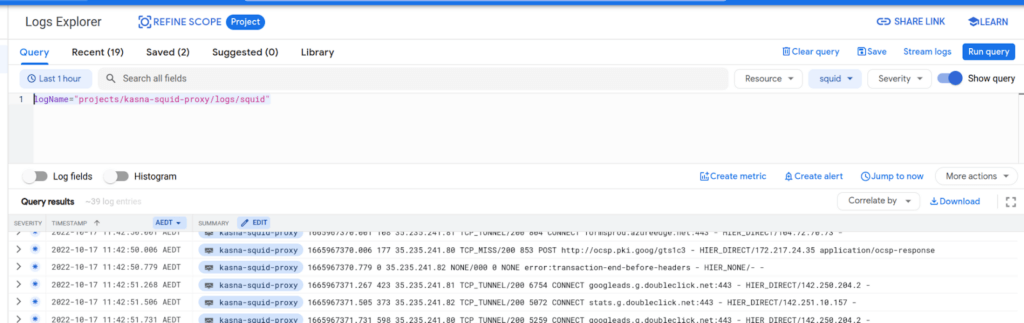
To see the Squid access and error logs, you need to set up a log query to look for;

Then you should see logs as per;

Conclusion

So that’s it, your very own proxy. Secure and fast, ready to use as a standalone system or you are welcome to integrate the code into your own project. One thing you could consider doing is increasing the size of the Squid VM if you have more users or need more network throughput, but I will leave  the fun of further experimentation for you to enjoy.